{The cartooning process} 4. Digitising the hand-drawn cartoons
Woofings! Welcome to the final instalment of my mini-series on how mum draws my cartoons.
Here’s what we’ve covered previously:
- Step 1: Cartooning materials + rough sketches
- Step 2. Fine sketches
- Step 3: Outlining
Now we’ll look at the step 4: turning the hand-drawn cartoons into a high quality digital file.
This is an impawtant step, because the cartoons have to be in a digital (computer) format in order to put the cartoons on this website, and to print them in my books.
Equipment for digitising cartoons
So far the equipment that’s been used has been simple and inexpensive: paper, pencil, eraser, pencil sharpener, tracing paper, outlining pens, and so on.
Things get a little more complex here! For my cartoons, mum uses:
- Scanner
- Compawter with PhotoShop software
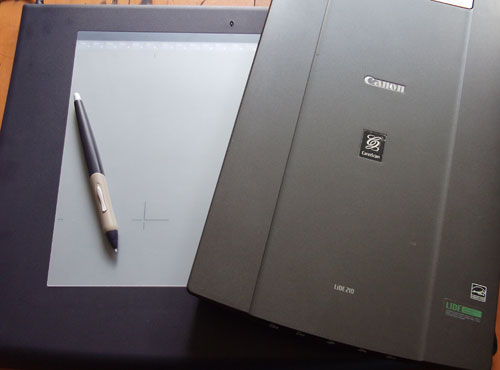
- Wacom Intuos 2 drawing tablet.

A drawing tablet and scanner are Minnie The Westie cartooning essentials.
Here are the steps mum works through to digitise my cartoons:
1. Scanning the cartoon outline
Mum scans my cartoons by putting the tracing paper (with the inked outline) on the scanner. The glass of the scanner must be super clean, so it’s a good idea to keep a cleaning cloth handy to wipe away dust and fingerprints.
The scanner is set at its highest resolution (600dpi), and the cartoons are scanned as black and white documents and saved as JPEG files.
2. Tidying up the scanned cartoon
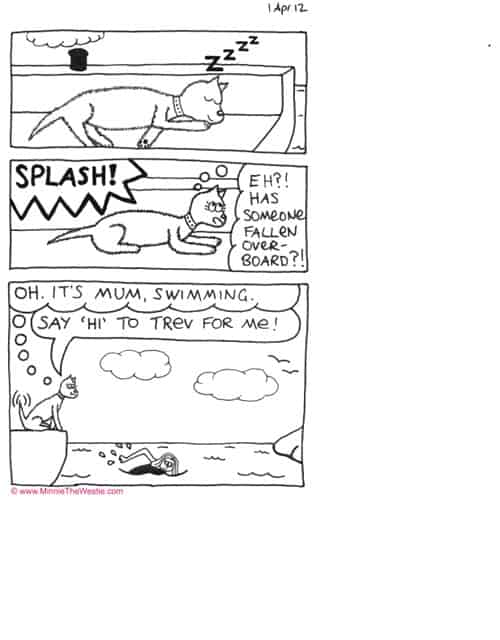
This is how a cartoon looks after scanning… as you can see, it is faint and doesn’t look very tidy. It also needs cropping, and many of the cartoons need to be straightened (rotated) too.

The scanned cartoon isn’t as crisp as it could be… plus it needs to be cropped and tidied.
This is where the PhotoShop software and Wacom drawing tablet come in handy to tidy up the cartoons!
When mum first started cartooning, she didn’t have the drawing tablet. It took her many hours to tidy up just one cartoon in PhotoShop, and her hand got very saw! She bought the drawing tablet secondhand and absolutely loves it.
Figuring out how to use PhotoShop has taken mum quite a while though. For my first book, it took mum about 3 hours to work on each cartoon… multiply that by the 85 cartoons in the book, and you get an idea of how long it all took to put together!
Obviously mum needed to get more efficient. Here’s what she did…
(a) Using a PhotoShop ‘Action’ to automate the most time-consuming work
The way mum used to tidy up my cartoons in PhotoShop was time-consuming and also very boring. Just think, she could have been spending that time giving me belly rubs instead! Something had to be done!
Thankfully mum’s web designer friend Trisha in Australia came to the rescue. She wrote a customised PhotoShop Action for mum… this does in 3 seconds what used to take mum an hour or two! No exaggeration!
The screenshot below gives you an idea of what the script does. All mum has to do is click the “play” button, and PhotoShop does all of this in seconds:

These PhotoShop actions do in 3 seconds what used to take mum 1 to 2 hours!
Mum does make some manual edits to the cartoon as well, for example to tidy up wonky lines or insert something she forgot to draw initially. She is a pawfectionist!
(b) Using a custom font for the lettering
In my first book, mum did all the handwriting in pen and then tidied it up in PhotoShop. She’s insistent that the lettering must be easy to read, but alas she is not gifted with naturally neat handwriting. (She says she was the only kid at Primary School who had to do handwriting homework!)
So for my first book, mum spent about an hour tidying up the writing on each cartoon… that’s an hour on top of the two hours she’s already spent PhotoShopping!
Again, this work was time-consuming and boring, so a better way had to be found! So for my second book, she had a font made from her very neatest handwriting from YourFonts… this was just US$10-15, so very well worth it!
NB: Mum has retained some of her handwriting in some instances. For example, the cartoon you’ve seen evolving on this page maintains mum’s handwriting for my zzzzzs and also the SPLASH!
So now all she has to do is white-out the handwriting that’s been scanned, and type it in the “Minnie Cartoon” font. Not only is this much quicker, but it is much easier to read, too. (And it means mum can spend more time giving me belly rubs, yeahhh!)
(c) Inserting the blurbs
Now the cartoon is nearly finished! Mum now adds the following to make the cartoons look all professional ‘n’ stuff:
- Numbering: each cartoon has a unique number to identify it by. This is usually in the bottom left hand corner of the bottom frame.
- Signature: mum’s surname, Luethi, usually appears in the bottom right hand corner of the bottom frame.
- Website address: so people know where to find my cartoons!
- Copyright details: to identify mum’s company as the legal owner of my cartoons.
And that’s it!
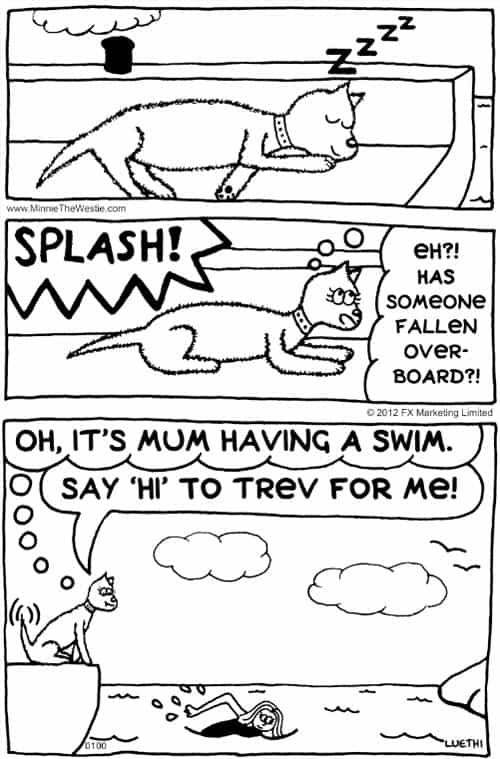
Here’s the finished cartoon:

The finished Minnie The Westie cartoon.
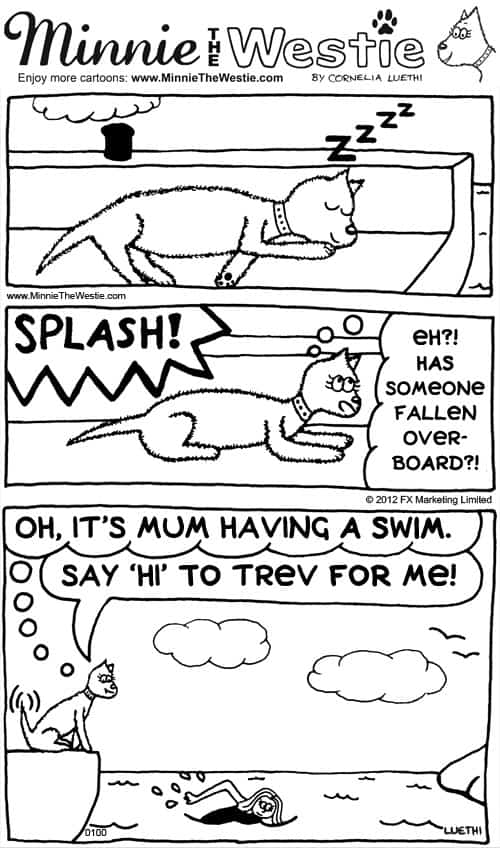
Or if the cartoon is going to be used on my website, Minnie Mail or elsewhere, mum adds my masthead to it. Again, she does this in PhotoShop, and is very quick.
Here’s the cartoon with the masthead added:

When you see my cartoons on my website or in Minnie Mail, they will usually have my masthead at the top, for that extra “Minnie The Westie” touch!
So now you’ve seen the creation process of my dog cartoons from start to finish!
Wags ‘n’ licks,

To link to this post, use: https://www.minniethewestie.com/the-cartooning-process-4-digitising-the-hand-drawn-cartoons